谁能想到400kb的代码能干这事?
>>轻量高效. 仅仅7 张数据表,加上不足400KB 的代码,就实现了完整的插件与模板机制。超低的CPU 和内存使用率,足以发挥主机的最高性能。
是的,就是现在你看到的这个网站。It's mine.
现在,我将手把手教你用Typecho做网站。
Typecho 官网:
http://typecho.org
https://github.com/typecho/typecho
LNMP +Typecho 操作方案 (Ubuntu 18.04LTS)
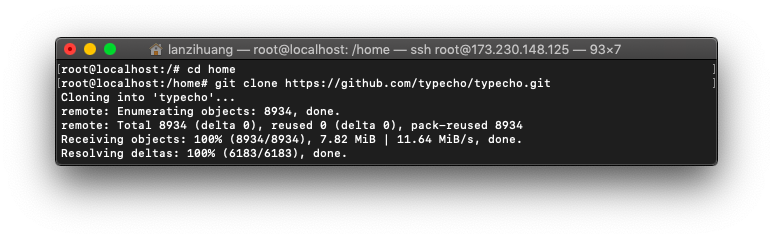
下载Typecho源码
cd /home进入home目录下,并下载typecho
git clone https://github.com/typecho/typecho.git
还没有VPS的小伙伴可以考虑先去买一个。
下载军哥LNMP一键安装包进行安装
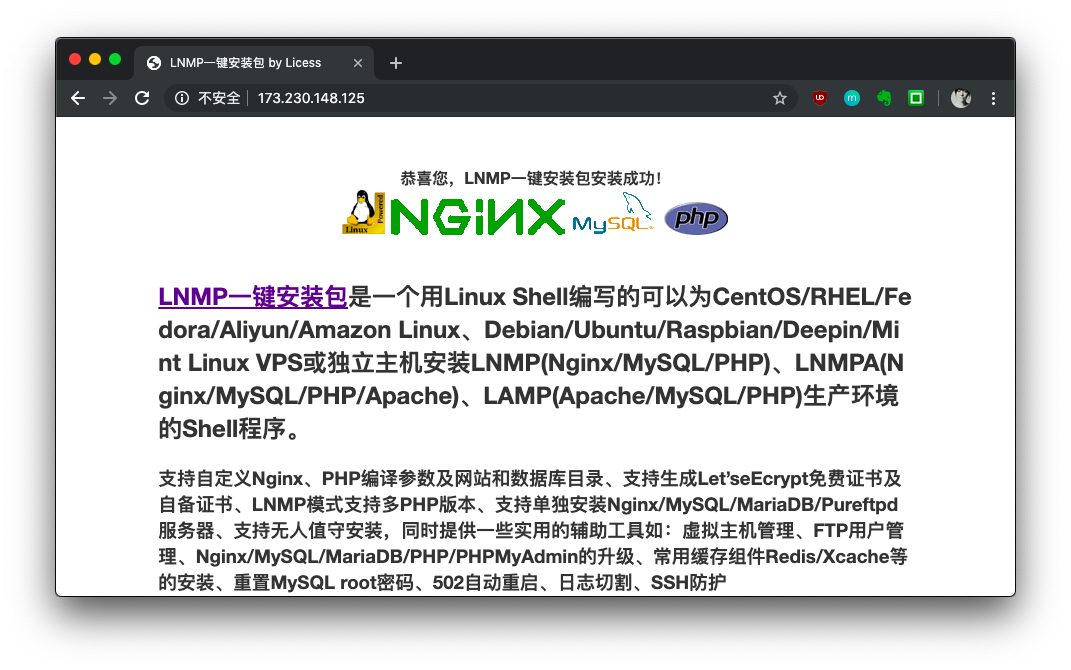
LNMP一键包是什么
LNMP一键安装包是一个用Linux Shell编写的可以为CentOS/RadHat/Fedora、Debian/Ubuntu/Raspbian VPS或独立主机安装LNMP、LNMPA、LAMP生产环境 ...
LNMP生产环境是什么
LNMP是指一组通常一起使用来运行动态网站或者服务器的自由软件名称首字母缩写。L指Linux,N指Nginx,M一般指MySQL,也可以指MariaDB,P一般指PHP,也可以指Perl或Python。
关于Lnmp一键安装包的详细说明:lnmp.org
LNMP安装
cd /home进入home目录,下载并安装LNMP
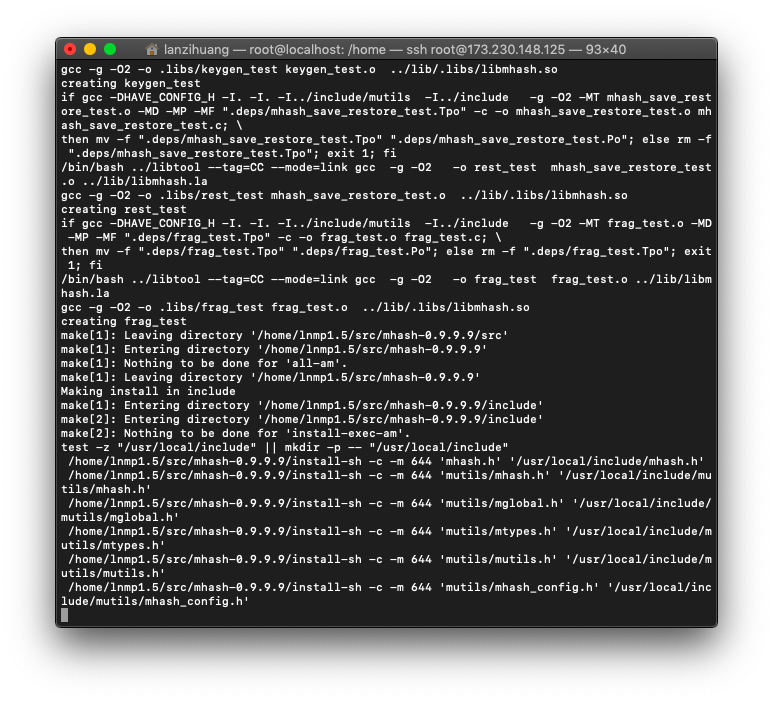
wget http://soft.vpser.net/lnmp/lnmp1.5.tar.gz -cO lnmp1.5.tar.gz && tar zxf lnmp1.5.tar.gz && cd lnmp1.5 && ./install.sh lnmp
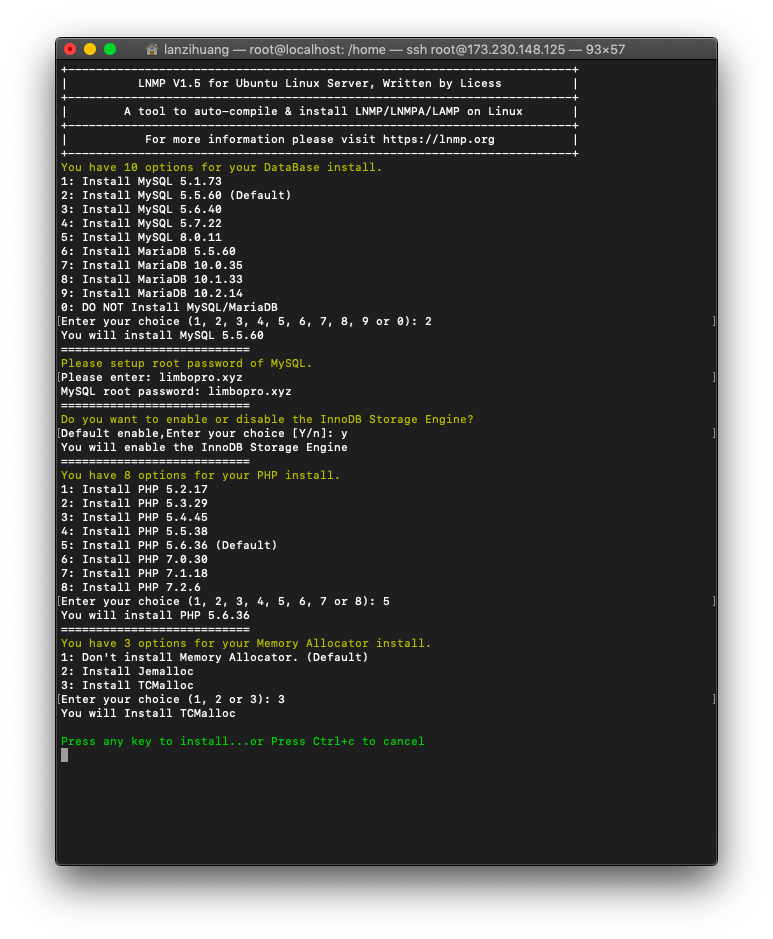
上图中,注意!出现得这句话,为root用户设置MySql密码(设置时写下来,日后都要用)
>>Please setup root password of MySql.接下来便是长达30~60分钟的等待(这时,其实可以离开。去玩会儿)
好了,宝贝。
>>Install lnmp takes 52 minutes.
>>Install lnmp V1.5 completed! enjoy it.
LNMP命令行
务必多看看这些命令行,以后会用到很多。点这里查看更多
LNMP 1.2+状态管理: lnmp {start|stop|reload|restart|kill|status}
LNMP 1.2+各个程序状态管理: lnmp {nginx|mysql|mariadb|php-fpm|pureftpd} {start|stop|reload|restart|kill|status}
LNMP 1.1状态管理: /root/lnmp {start|stop|reload|restart|kill|status}
Nginx状态管理:/etc/init.d/nginx {start|stop|reload|restart}
MySQL状态管理:/etc/init.d/mysql {start|stop|restart|reload|force-reload|status}
Memcached状态管理:/etc/init.d/memcached {start|stop|restart}
PHP-FPM状态管理:/etc/init.d/php-fpm {start|stop|quit|restart|reload|logrotate}
PureFTPd状态管理: /etc/init.d/pureftpd {start|stop|restart|kill|status}
ProFTPd状态管理: /etc/init.d/proftpd {start|stop|restart|reload}
Redis状态管理: /etc/init.d/redis {start|stop|restart|kill}
以上命令,随便拿个试试看!
lnmp start 重启lnmp服务,
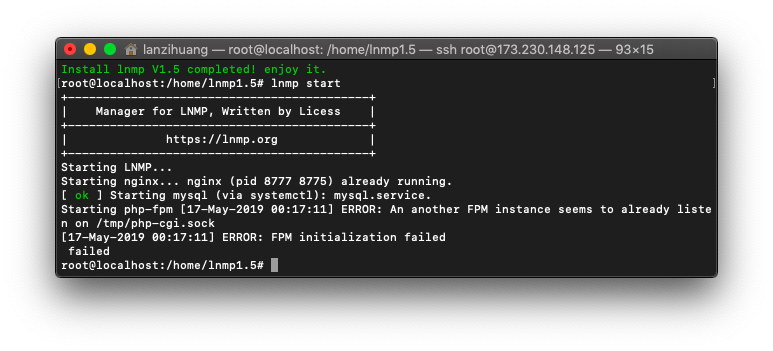
哦,让我Enjoy?其实LNMP已经在运行了。(才会出现:ERROR: FPM initialization failed)
浏览器输入服务器IP地址
妥了。
离成功就差一步。
LNMP相关软件安装位置。点此查看更多说明
Nginx 目录: /usr/local/nginx/
MySQL 目录 : /usr/local/mysql/
MySQL数据库所在目录:/usr/local/mysql/var/
MariaDB 目录 : /usr/local/mariadb/
MariaDB数据库所在目录:/usr/local/mariadb/var/
PHP目录 : /usr/local/php/
多PHP版本目录 : /usr/local/php5.5/ 其他版本前面5.5的版本号换成其他即可
PHPMyAdmin目录 : 0.9版本为/home/wwwroot/phpmyadmin/ 1.0及以后版本为 /home/wwwroot/default/phpmyadmin/ 强烈建议将此目录重命名为其不容易猜到的名字。phpmyadmin可自己从官网下载新版替换。
默认网站目录 : 0.9版本为 /home/wwwroot/ 1.0及以后版本为 /home/wwwroot/default/
Nginx日志目录:/home/wwwlogs/
/root/vhost.sh添加的虚拟主机配置文件所在目录:/usr/local/nginx/conf/vhost/
PureFtpd 目录:/usr/local/pureftpd/
PureFtpd web管理目录: 0.9版为/home/wwwroot/default/ftp/ 1.0版为 /home/wwwroot/default/ftp/
Proftpd 目录:/usr/local/proftpd/
Redis 目录:/usr/local/redis/
现在,我们就来增加一下Vhost配置文件(在此假定你没有购买域名)
开始配置Typecho
lnmp vhost add 为IP添加nginx配置文件
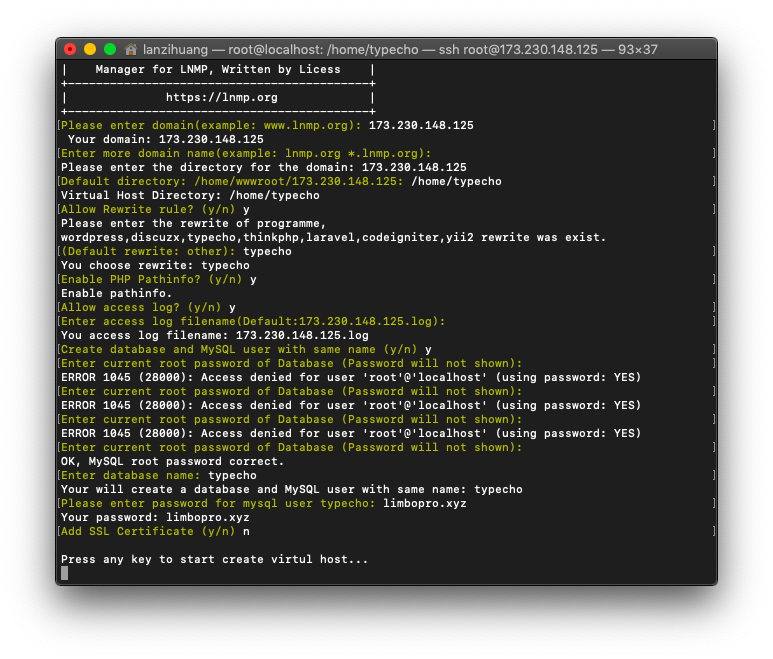
上图解释如下,
Please enter domain(example: www.lnmp.org): `173.230.148.125`(输入VPS IP地址)
 Your domain: 173.230.148.125
Enter more domain name(example: lnmp.org *.lnmp.org): (按回车键)
Please enter the directory for the domain: 173.230.148.125
Default directory: /home/wwwroot/173.230.148.125: `/home/typecho`(还记得我们下载typecho存放的地址吗?)
Virtual Host Directory: /home/typecho
Allow Rewrite rule? (y/n) `y`(输入y 按回车键)
Please enter the rewrite of programme,
wordpress,discuzx,typecho,thinkphp,laravel,codeigniter,yii2 rewrite was exist.
(Default rewrite: other): `typecho`(选择typecho)
You choose rewrite: typecho
Enable PHP Pathinfo? (y/n) `y`
Enable pathinfo.
Allow access log? (y/n) `y`
Enter access log filename(Default:173.230.148.125.log):
You access log filename: 173.230.148.125.log
Create database and MySQL user with same name (y/n) `y`
Enter current root password of Database (Password will not shown): *(mysql 之前设置的root用户密码,输入密码,按回车)*
OK, MySQL root password correct.
Enter database name: typecho(datebase名字,随意请名,但请牢记)
Your will create a database and MySQL user with same name: typecho
Please enter password for mysql user typecho: limbopro.com(设置数据库密码,务必记住等下安装typecho要用)
Your password: limbopro.com
Add SSL Certificate (y/n) `n`(如果你有域名可以要这一步,但是之前输入domain时就应该输入域名而不是IP地址才对)

Press any key to start create virtul host...

Create Virtul Host directory......
set permissions of Virtual Host directory......
You select the exist rewrite rule:/usr/local/nginx/conf/rewrite/typecho.conf
Test Nginx configure file......
nginx: the configuration file /usr/local/nginx/conf/nginx.conf syntax is ok
nginx: configuration file /usr/local/nginx/conf/nginx.conf test is successful
Reload Nginx......
Gracefully shutting down php-fpm . done
Starting php-fpm  done
Add database Sucessfully.
妥了。
lnmp restart 重启lnmp服务
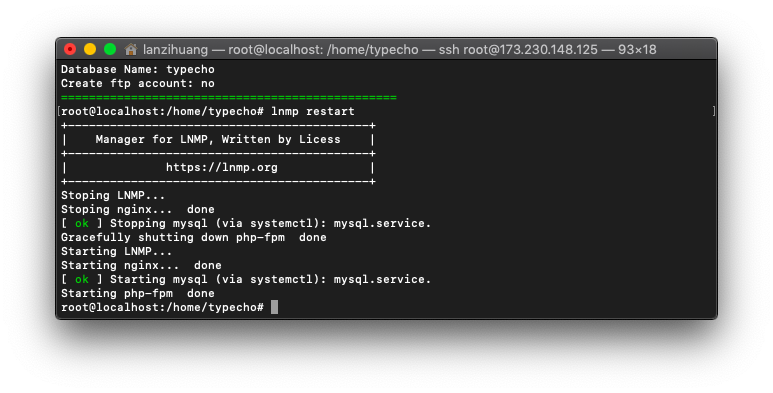
生效了
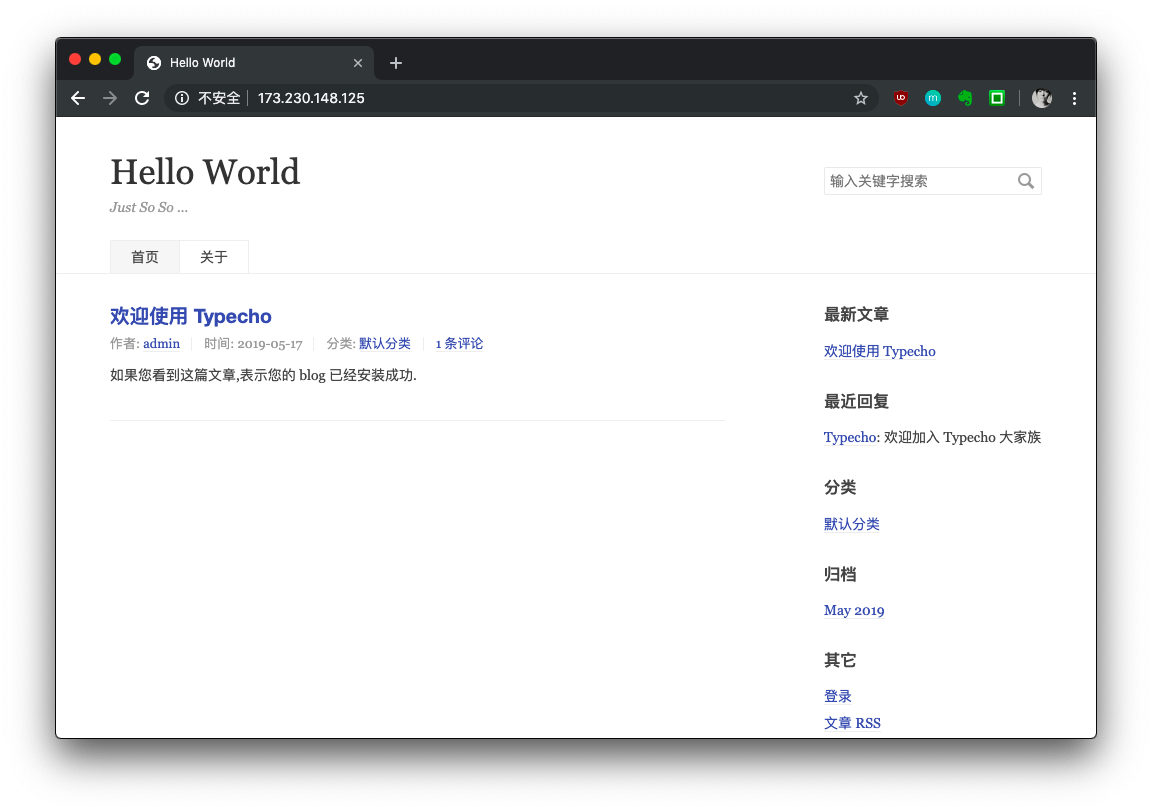
然后,浏览器刷新网页。见证奇迹。

点击 我准备好了,开始下一步>>
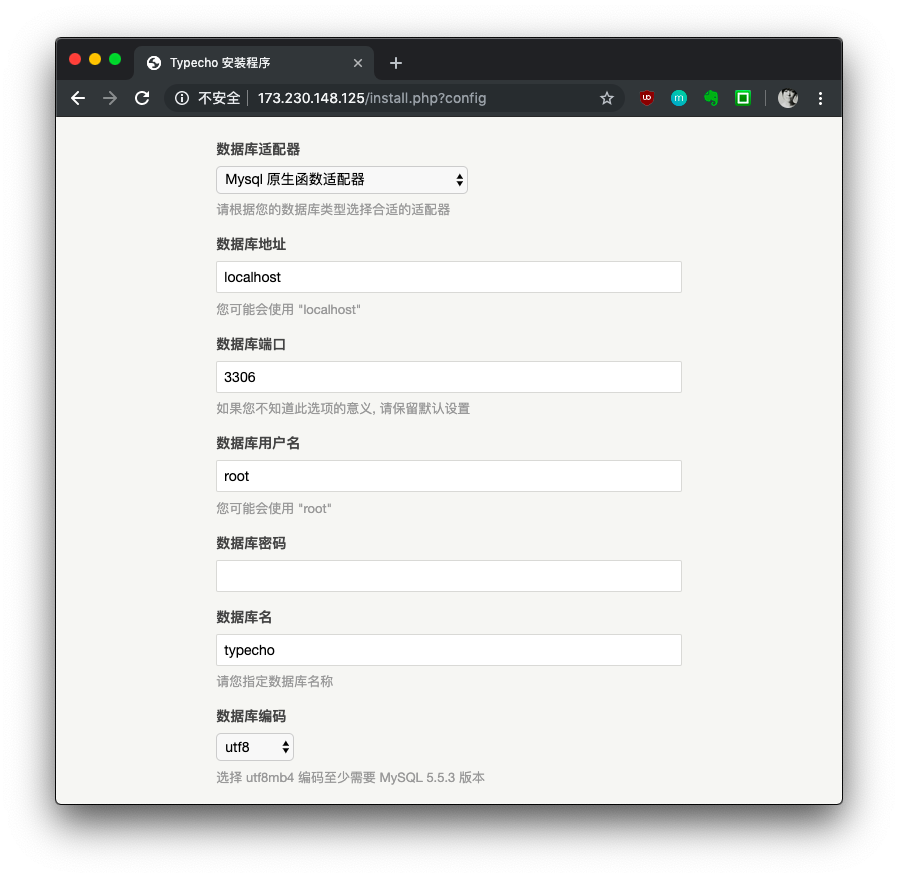
嘿!还记得刚刚我们设置的数据库密码吗?把它填上!
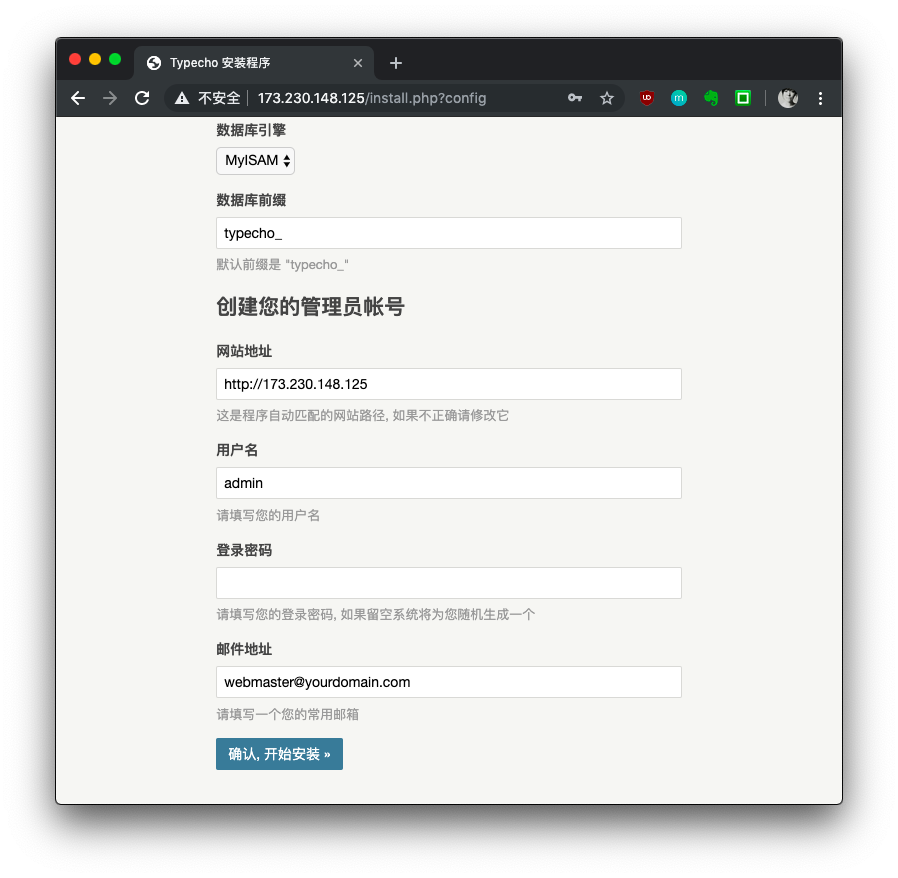
然后设置网站管理员密码,右键也可以填一下。
如果用户名不填,则默认为admin。
填好了吗?确认开始安装。
妥了。
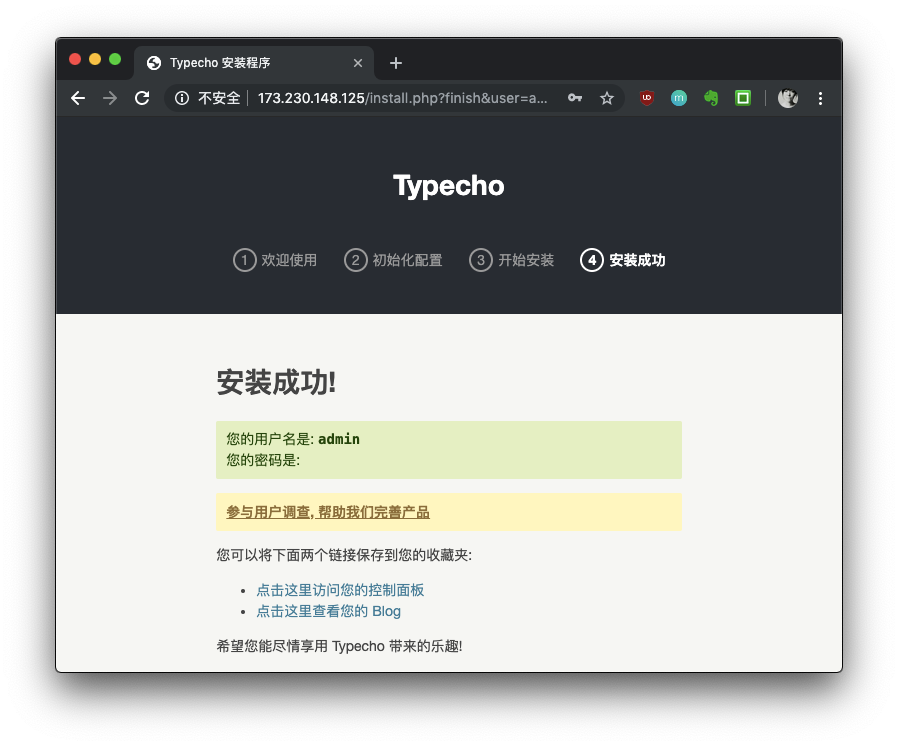
Hello word
参考资料:https://lnmp.org/
安装lnmp
LNMP安装了哪些软件?安装目录在哪?
LNMP状态管理命令
版权属于:毒奶
联系我们:https://limbopro.com/6.html
毒奶搜索:https://limbopro.com/search.html
番号搜索:https://limbopro.com/btsearch.html
机场推荐:https://limbopro.com/865.html IEPL专线/100Gb/¥15/月起(最高享8折优惠)
毒奶导航:https://limbopro.com/daohang/index.html本文链接:https://limbopro.com/archives/204.html · 镜像:https://limbopro.github.io/archives/204.html
本文采用 CC BY-NC-SA 4.0 许可协议,转载或引用本文时请遵守许可协议,注明出处、不得用于商业用途!